Description
Summing in a Mix within your DAW is a detailed video tutorial explaining what summing is and how to avoid it when mixing.
One of the biggest problems facing producers, all producers, is that of summing. A clear explanation is needed to understand what happens to audio in a mix project when summed and I hope that I have provided that both with the description below and the supplied video tutorial.
Summing
When identical frequencies that exist in two different layers (channels) are combined, you invariably get a gain boost at those frequencies.
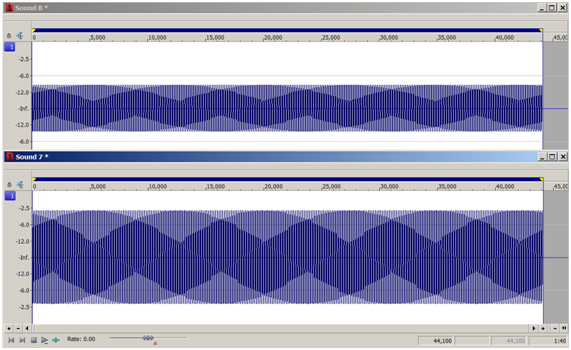
If you take two sine waves of the same frequency and amplitude, and sum them you will get a gain increase of 6dB (example below).
The waveform on the top is at ‑9 dB, and when duplicated and summed into a new single mono file we get a value of ‑3 dB. This is important information to take on board and nail into your brain: you can imagine what happens when you have a mix with a huge number of channels all summing and clipping the output simply because shared frequencies are always summed at the output.
The subject of Summing – why it happens and how to manage it- is too complex for some to grasp. Let me simplify it for you and get you managing your gains in no time.
In the Summing in a Mix within your DAW video, I show you how you can determine which frequencies are shared and which are summed. I explain how we use the GUI of DAW channel eq to tell us what is happening where in the mix. I explain every step of the process using a working mix.
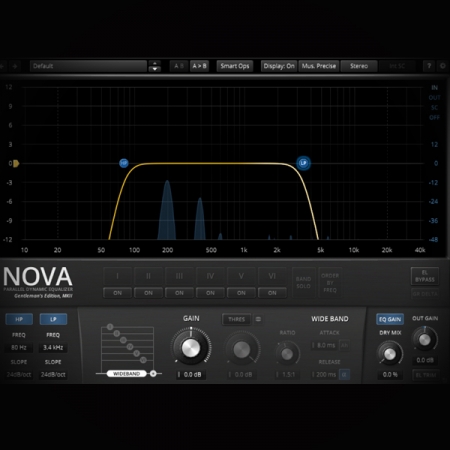
The plugin used in this video:
Topics covered in this video are:
- Summing within your DAW
- Metering for Control
- Gain Structuring your Project/Mixes
- Loudness Compensation
- Clashing and Smearing Frequencies
- Peak and RMS Control
- Managing Gains
If you found this tutorial helpful then give these a try:
Avoiding Masking and Summing of frequencies by Panning
The Pan Law within your DAW explained in detail
Total and Partial Phase cancellation
Stealing Transients – Maximising Loudness


